Trailer Tool
The Trailer Tool allows you to create any tiny house trailer that you can imagine and make sure it accurately represents the trailer that you're building on.
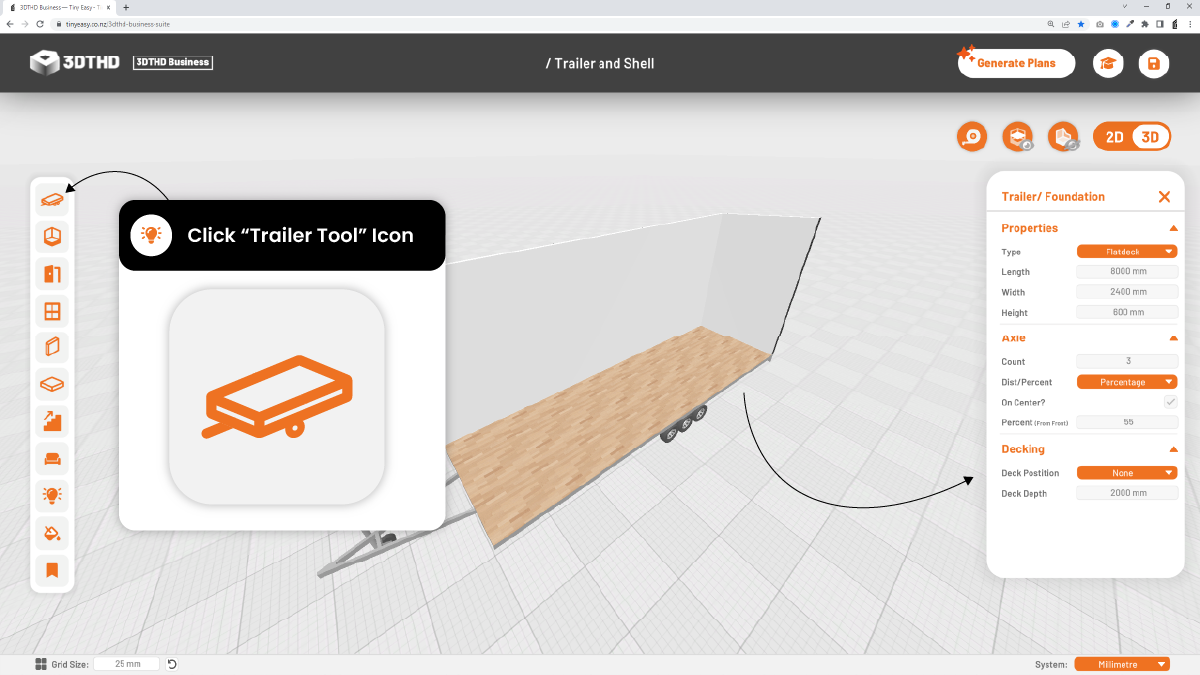
We've built this feature to save you time and headache modelling up an accurate tiny house trailer. We wanted to ensure that when you're designing your tiny home, it looks exactly the way you want. What other software can do this?
Type:
In the Trailer/Foundation Menu; go the Properties section at the top and choose your Trailer/Foundation type to match the trailer you'll be using for your build.
You can choose from:
Flatdeck
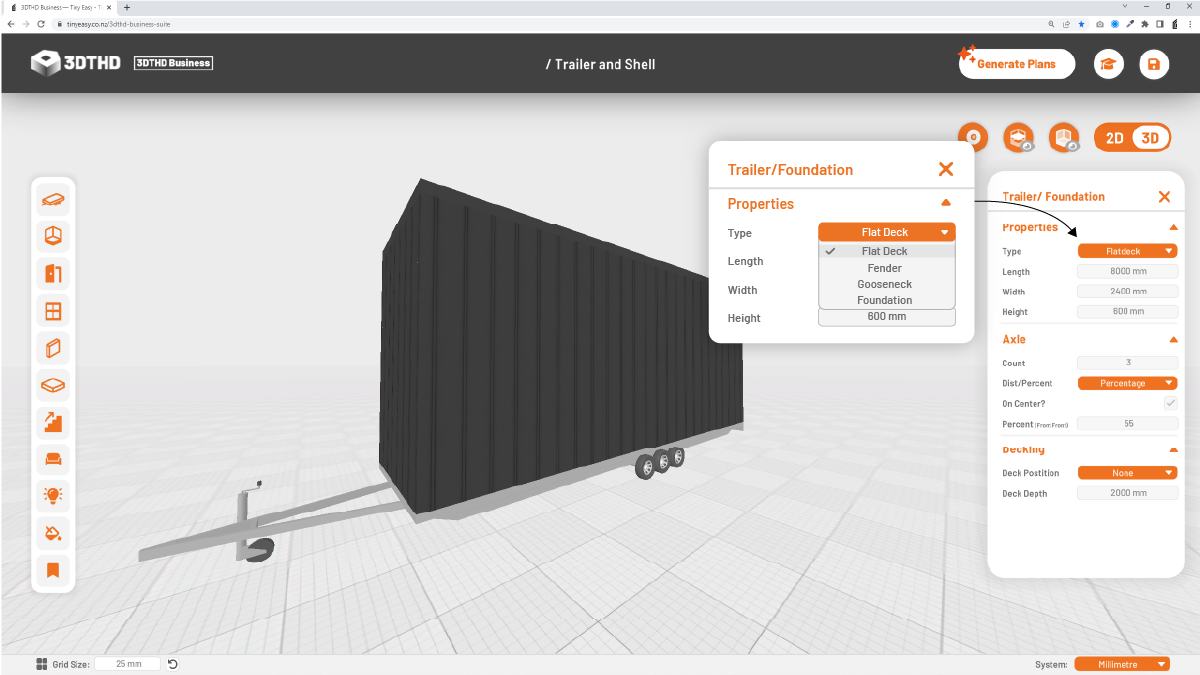
- A continuous platform with all the axles and wheels underneath the platform. Most common in Australia, New Zealand and Europe.
Fender
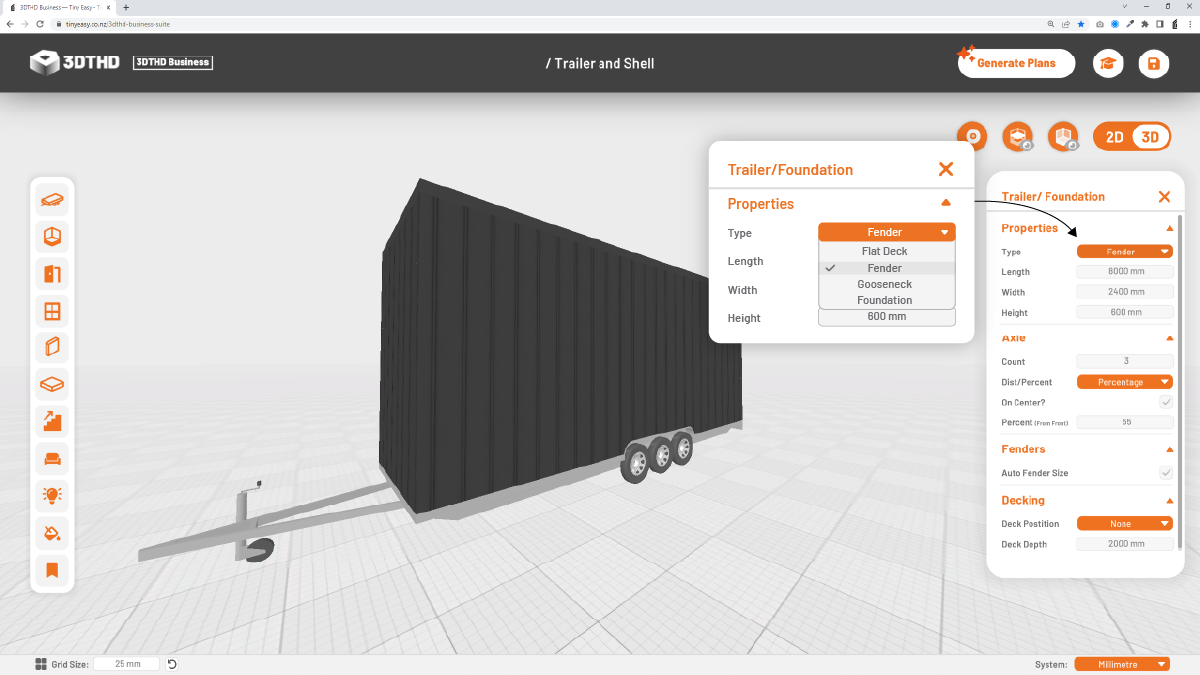
- A trailer with wheels that are higher than the trailer deck, covered by a fender on either side. Most common in the USA and Canada.
Gooseneck
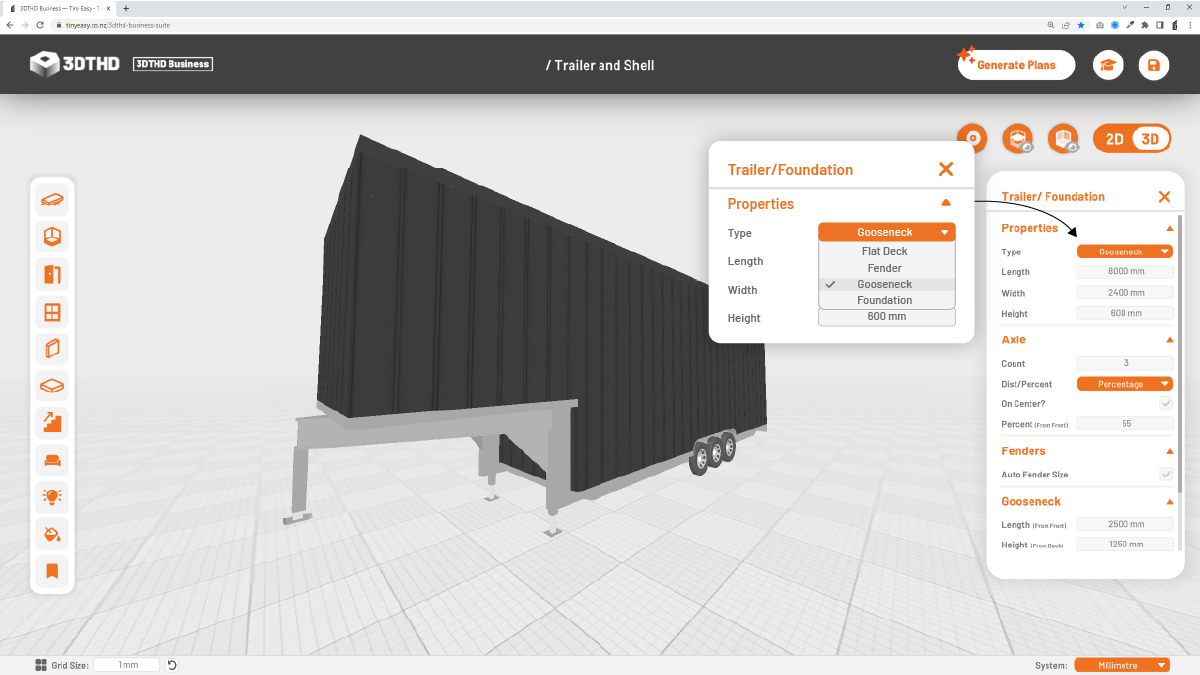
- A trailer with a bump-out in the front is used to connect to a truck for towing. This trailer works great for heavier designs. Most commonly used in the USA and Canada.
Foundation
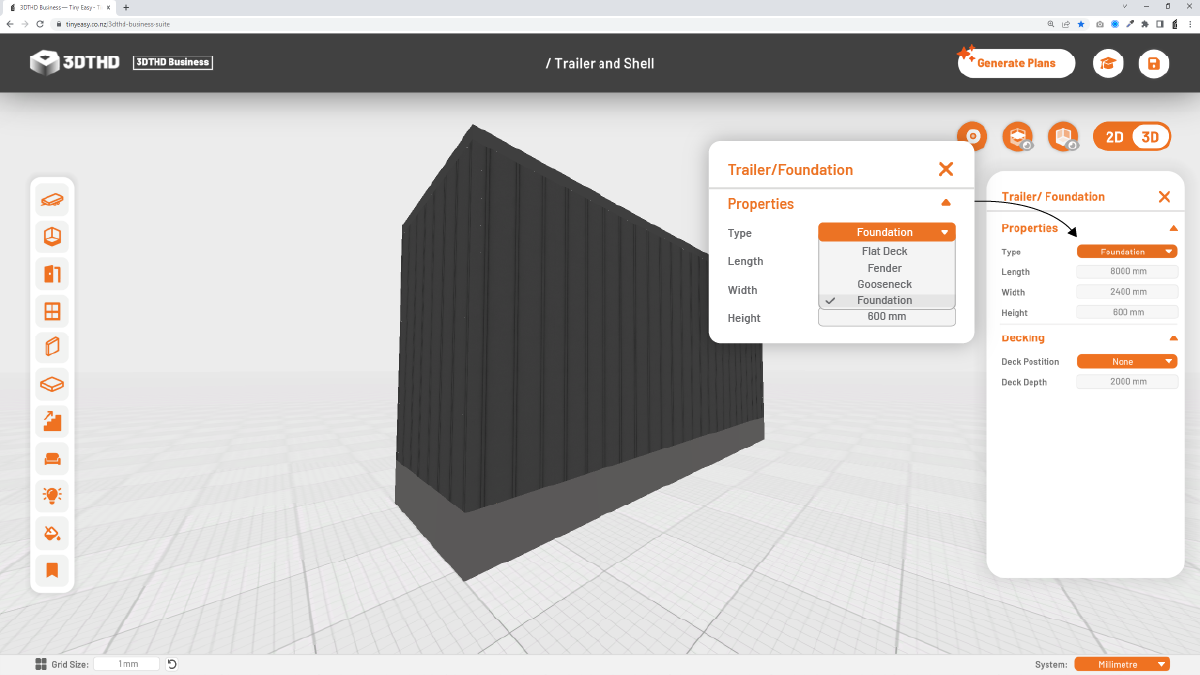
- No trailer; just a standard foundation. This is a placeholder for skid, pile or concrete foundations. This is great if you're building cabins/tiny homes on a foundation and want to show your clients an accurate representation of their design. Also great for container homes!
Bulk Move Interior - 🌟NEW🌟
19/04/23
A new addition to the Trailer Tool is this time-saving tool; Bulk Move Interior. This latest feature is super helpful if you've adjusted the length or width of your tiny home. Previously, the process would be manually moving each individual item into the right spot.
Now, you can simply move the interior in bulk towards a certain direction. You can find this tool under the properties manager in the Trailer Tool.
To use this tool:
- Specify the move object direction.
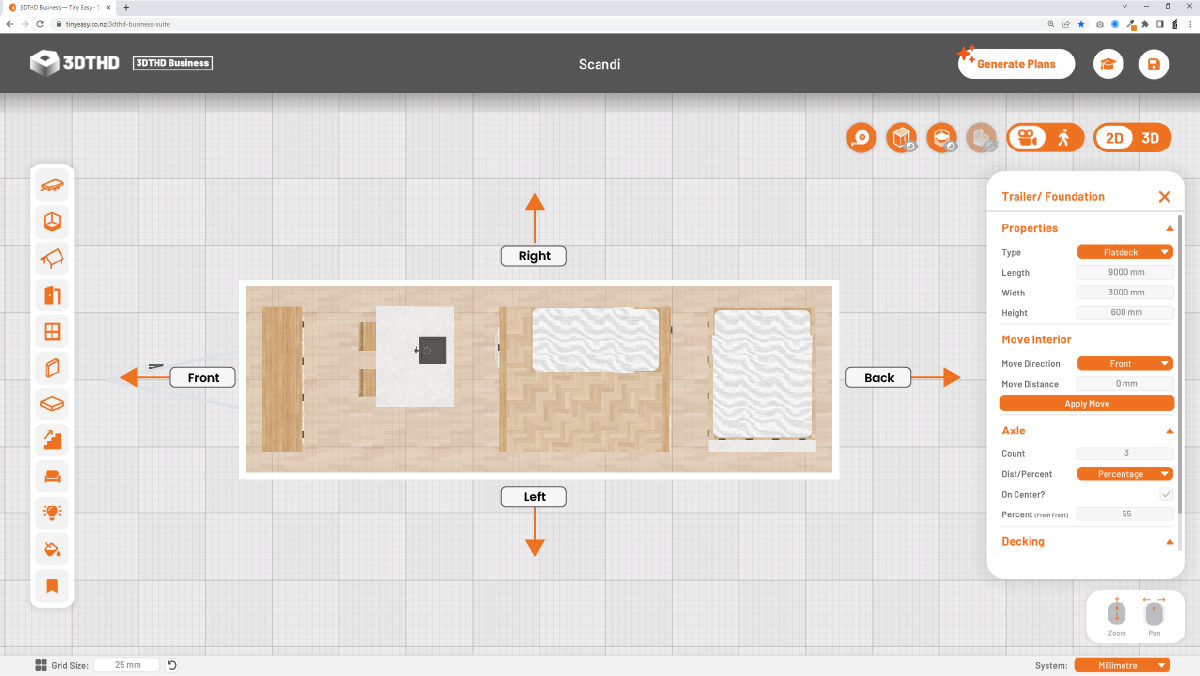
- Enter the move distance.
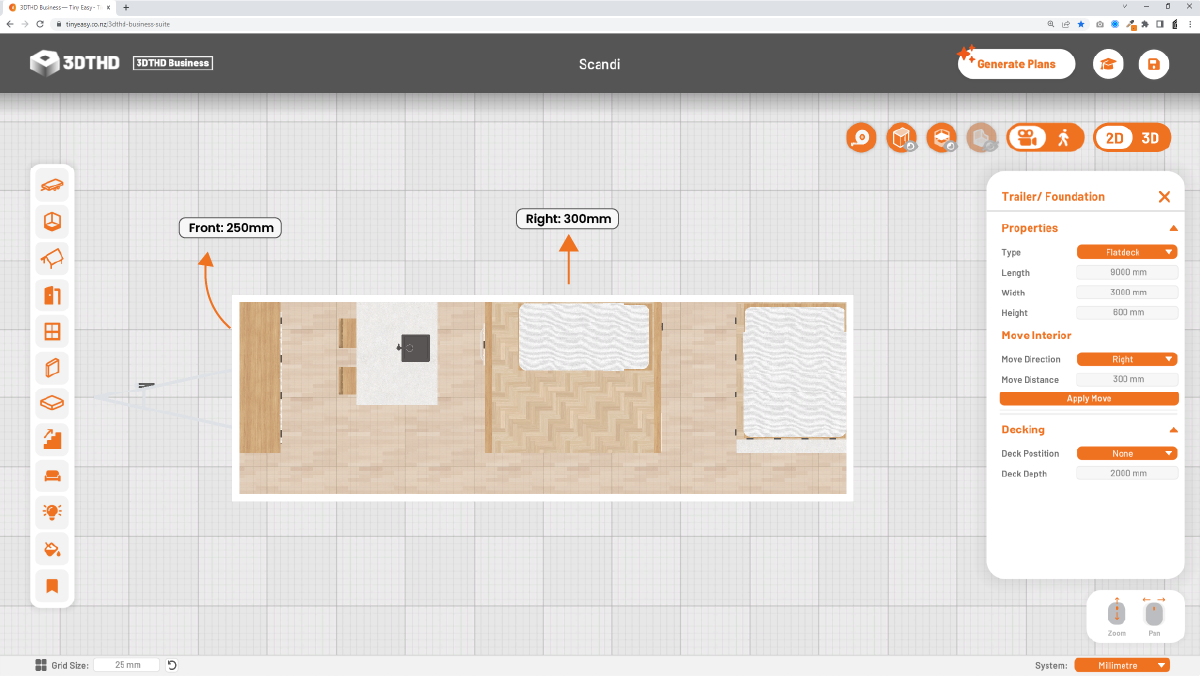
The model is centre based which means that when adjusting the length of the tiny house by 1000mm for example, it will extend the shell by 500mm from the front and 500mm to the back.
When moving the interior - divide the distance by half; for example, if you've extended your tiny house from 8500mm to 9000mm in length, move your interior to 250mm.
Tiny House Dimensions
The basic dimensions of the trailer, length, width and height are all in the Properties section; here you can adjust and change the dimensions of your trailer.
Length
The Length of the buildable area excluding the drawbar.

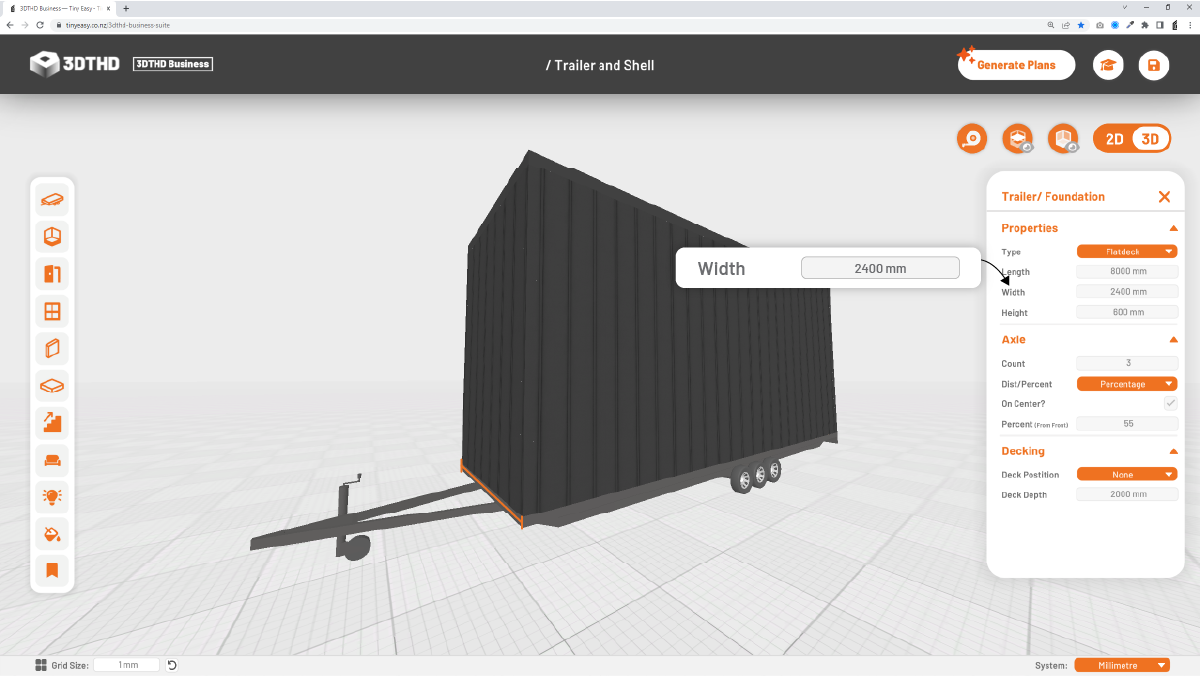
Width
The Width of the buildable area.
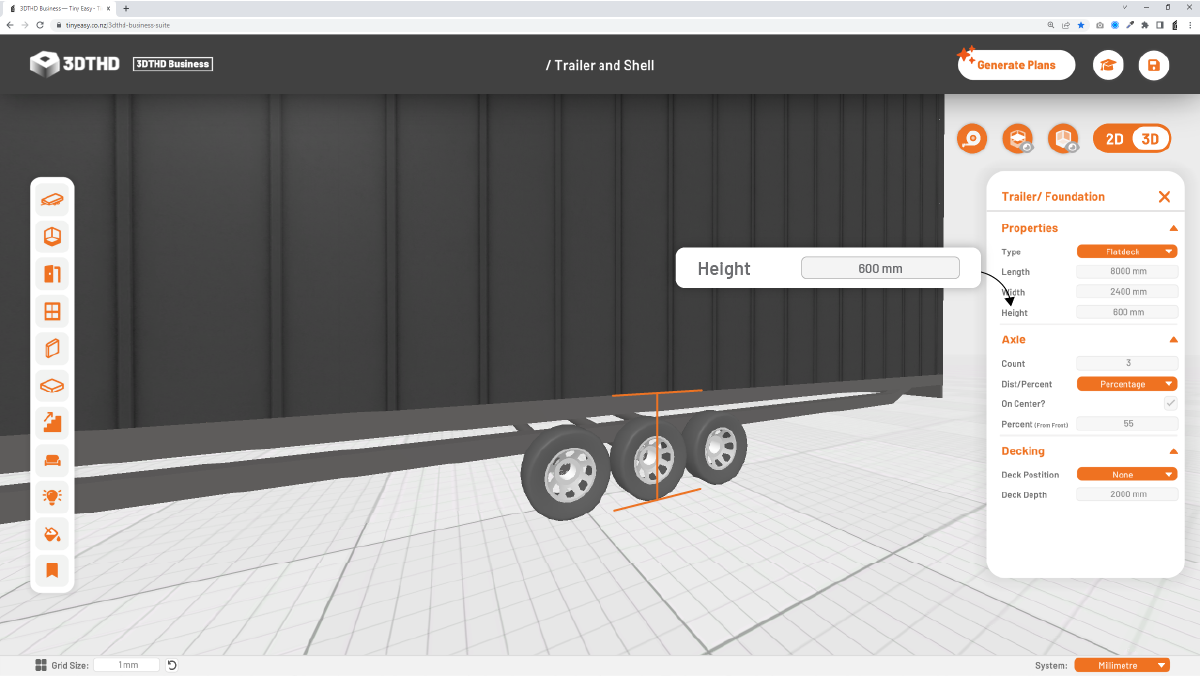
Height
The height of the trailer from ground to the top of the "floor" on which you will build your tiny house walls on.
Axle
Depending on how custom you want to go, you can adjust the settings of the axle on your trailer, whether you want to adjust the Axle Count, or the distance from the front of your trailer to the axles
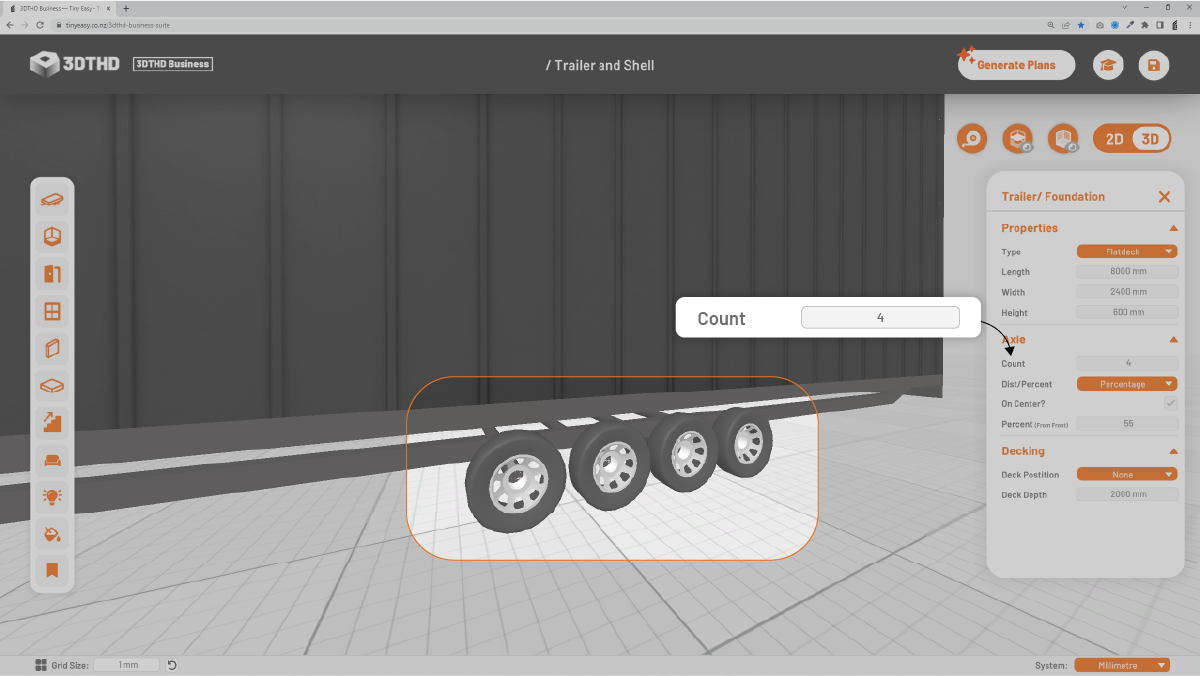
Axle Count
Change the number of axles for your tiny house trailer.
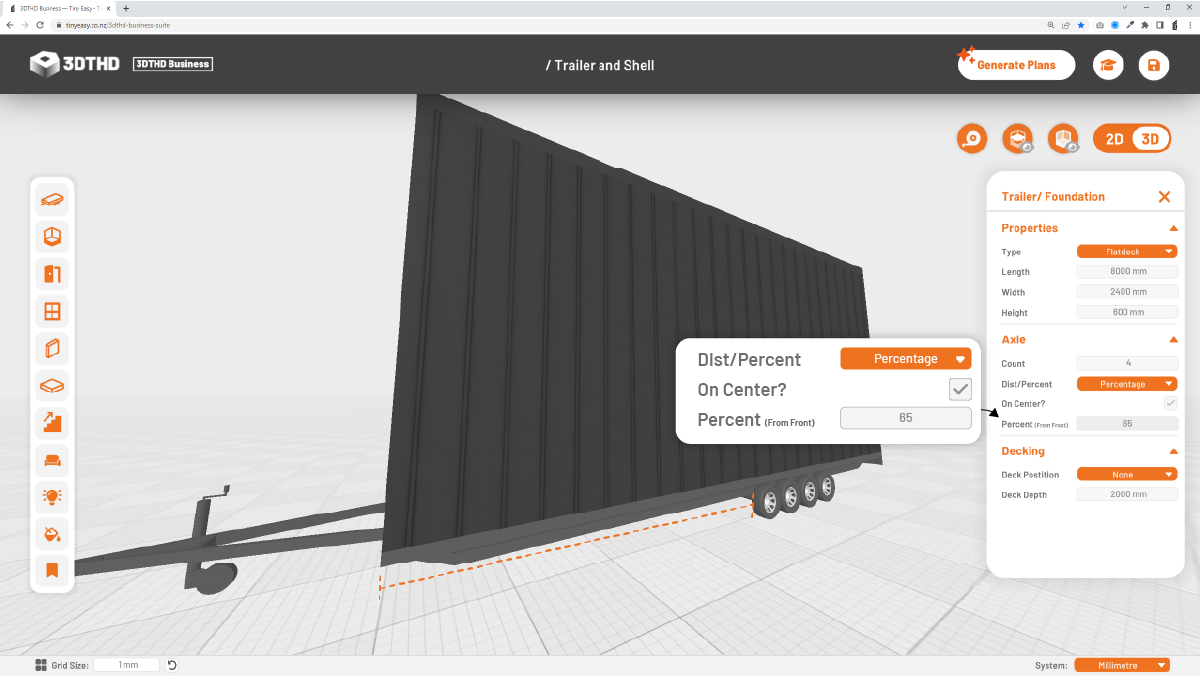
Distance/Percentage
Change the distance between the front of your trailer and your axles. Switch the mode between a distance or a percentage that calculates the distance for you.
On Center?
The Tickbox defines whether the distance from the front is measured to the center of all axles, or to the first axle.
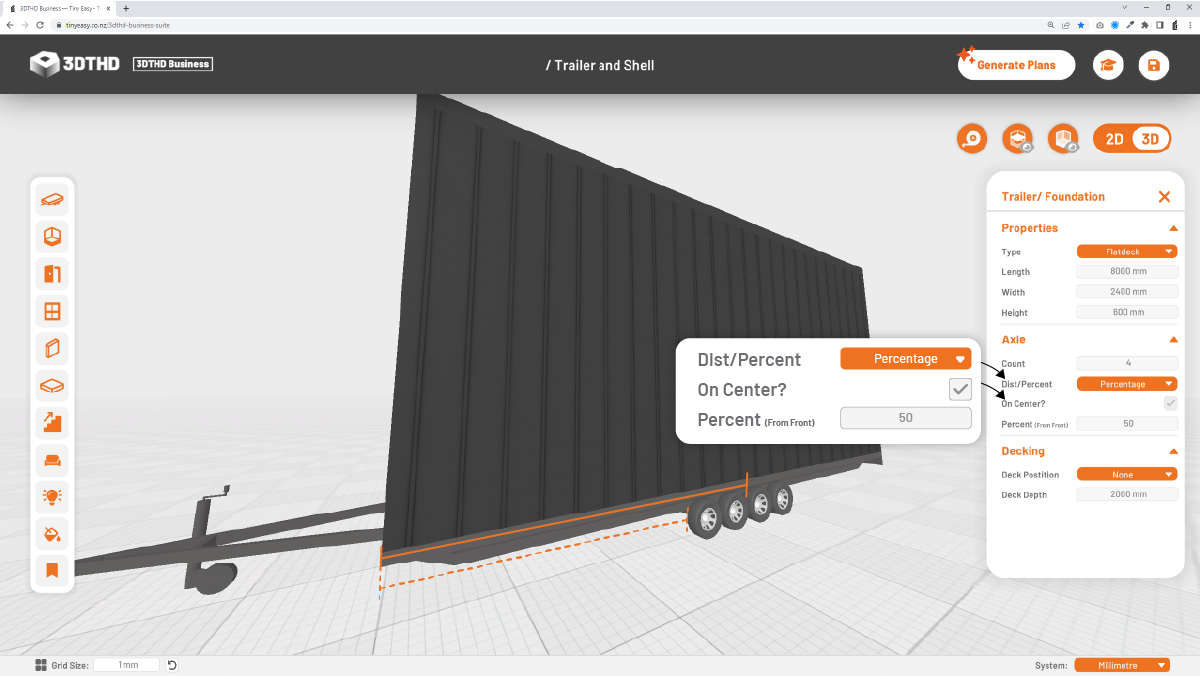
Distance
Enter the first offset distance from the front of the trailer pad either in a percentage format or distance in mm/ft/in depending on your previous selection.
Notice how I've changed the "Percentage from Front" in the previous image from 50 to 65.
Deck Tool - 🌟Updated
05/05/23
The decking tool, is an extra feature you can add later once your tiny house design is complete. This is great to use if you're designing your tiny house for a specific site in mind, or to present to your clients.
To activate the deck:
- Select the deck tool icon.
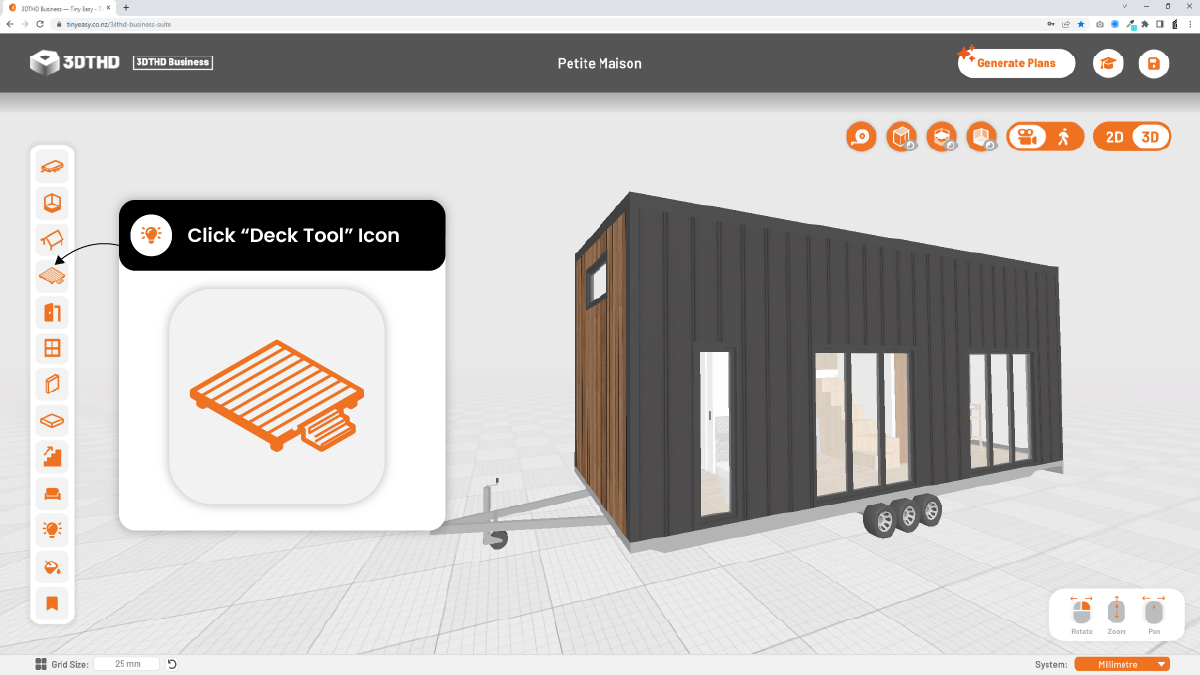
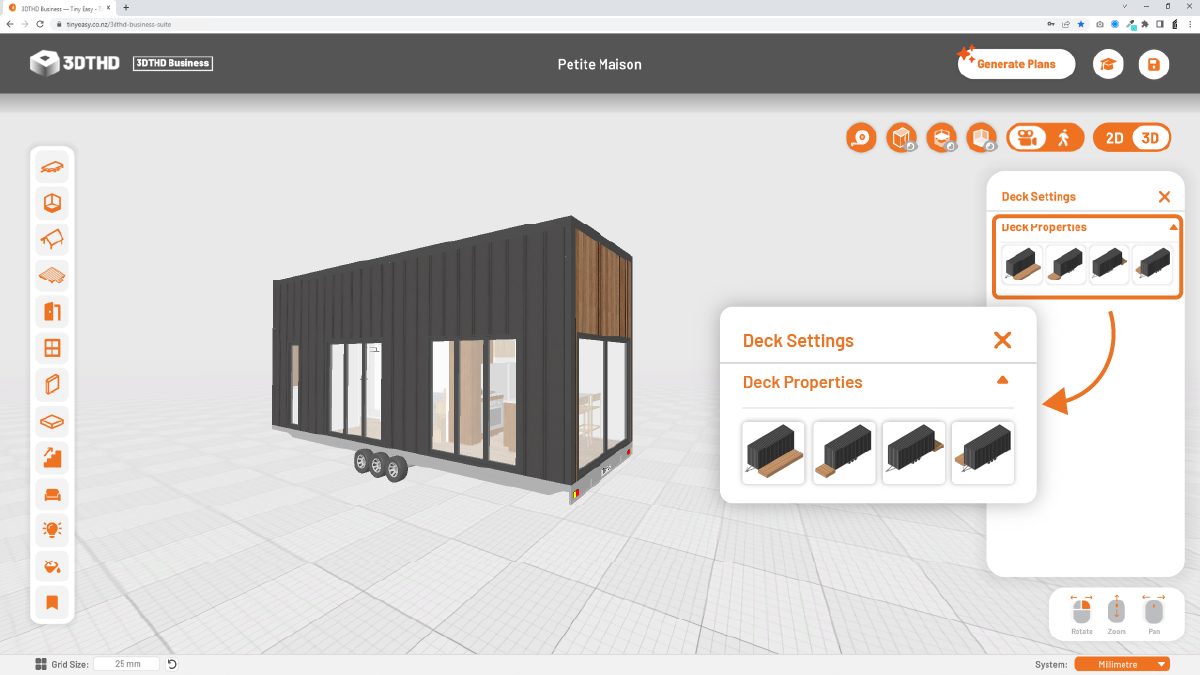
On the right side of your screen, the Deck Settings menu will appear with 4 deck position options.
To activate the decks, you can choose from either one of the positions. - Once selected, an orange border will appear around the button to show you which deck is active.
Modify Deck Properties:
Click on a deck to select it. This will activate the Deck Properties for the selected deck only.
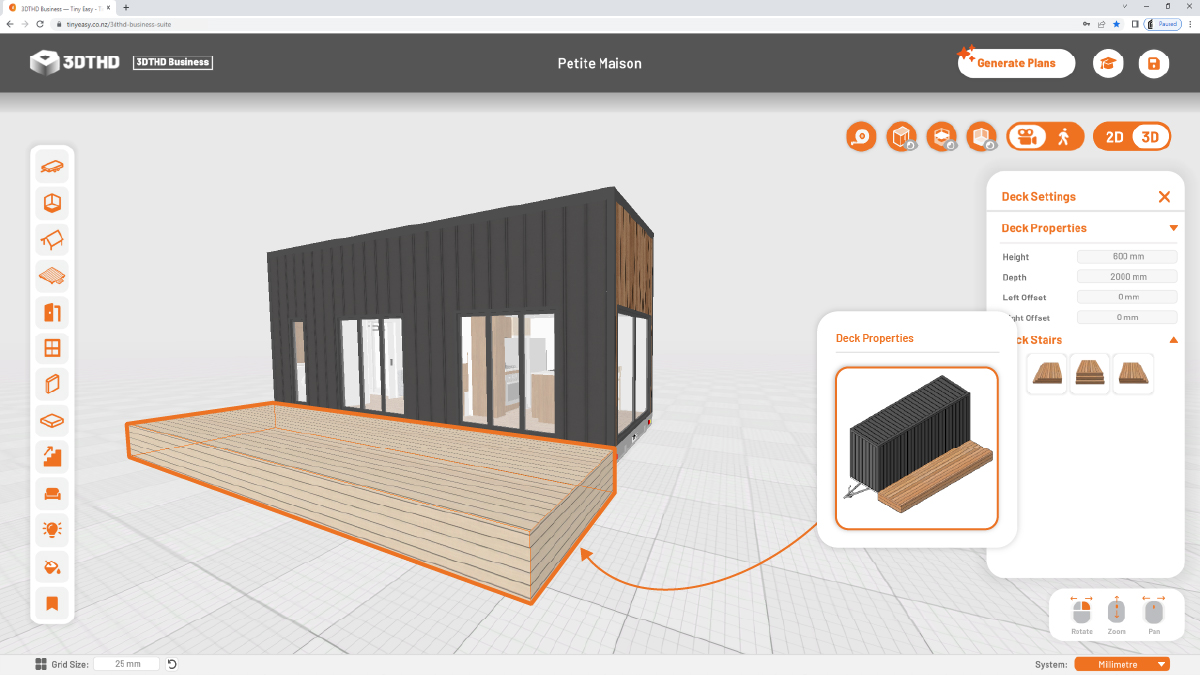
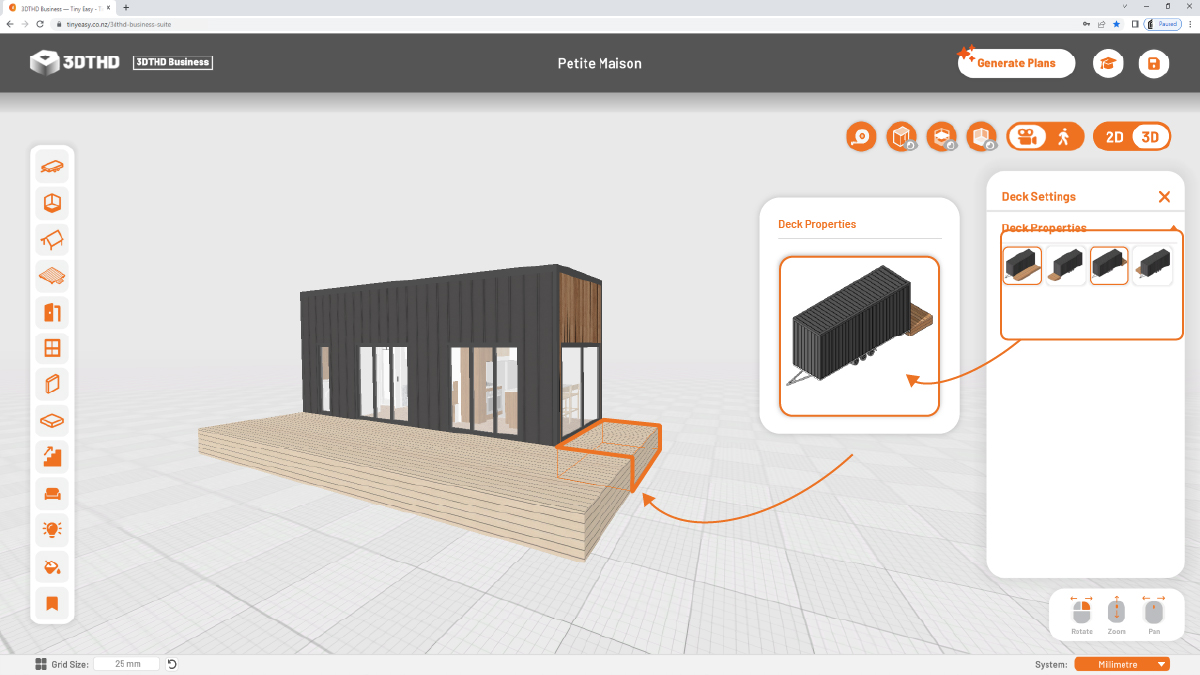
In the deck properties you can adjust the:
- Height
- Depth
- Left Offset
- Right Offset
Left & Right Offset:
The Offset tool allows you to offset the length of your deck to the left and right. This is handy if you want an L-shaped wrap-around deck.
Left & Right Offset Negative Value:
To extend the deck past the trailer, simply add a negative value to your dimension input.
For example, if you want to extend the deck by 2 meters past the trailer, enter: -2000 mm.

To remove the decks. Select the main deck icon in the navbar to your left. This will open the deck menu.
Select the deck you wish to remove and it will automatically update.
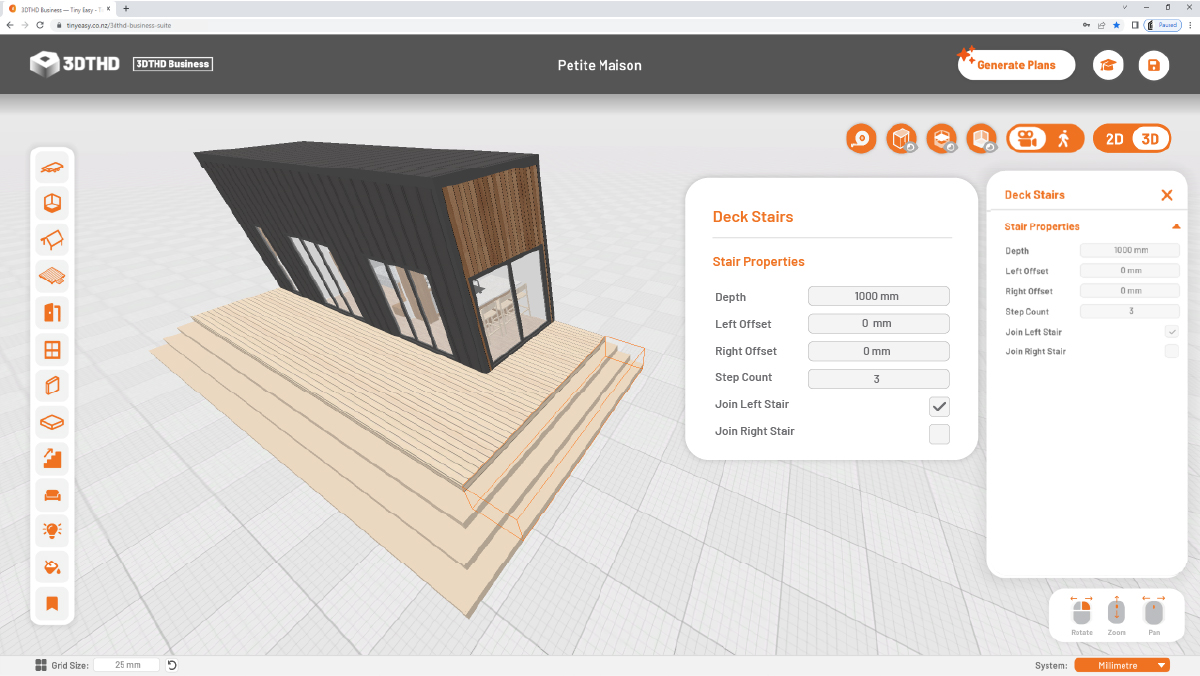
Add Stairs to your Deck:
To add stairs to your deck, select the deck and the Properties menu will appear. Below you can find the section for Deck Stairs.
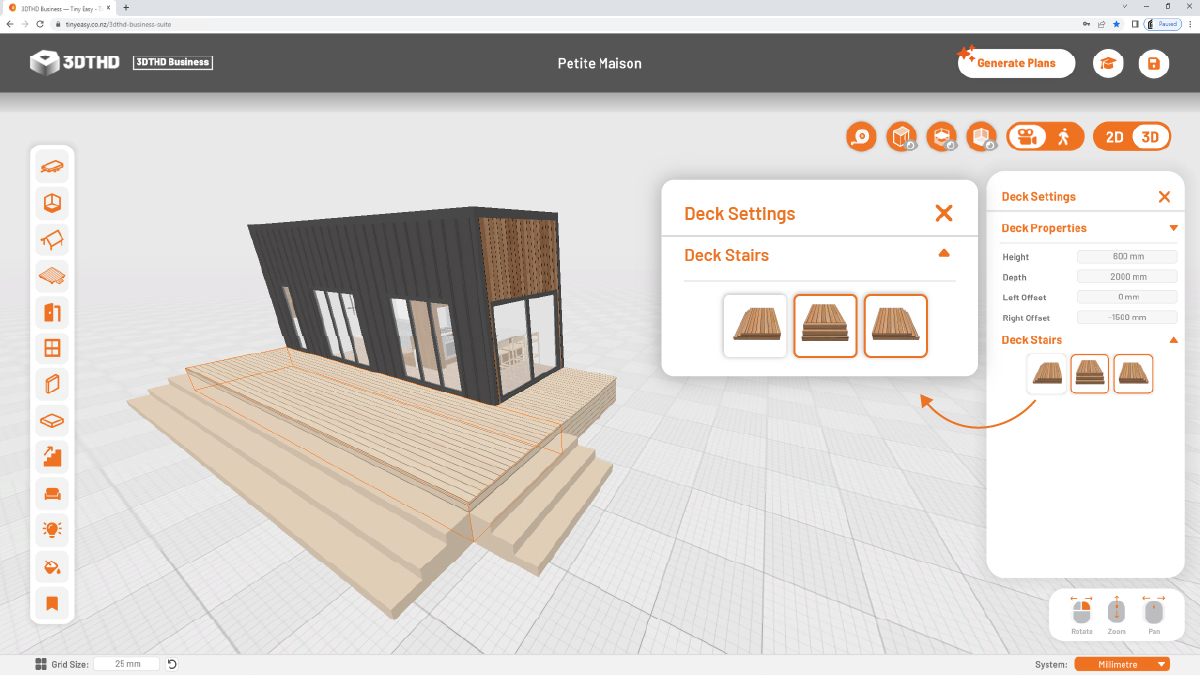
Just like the decks you can select the position of the stairs. Once selected you can select the individual stair to modify and adjust to your requirements.
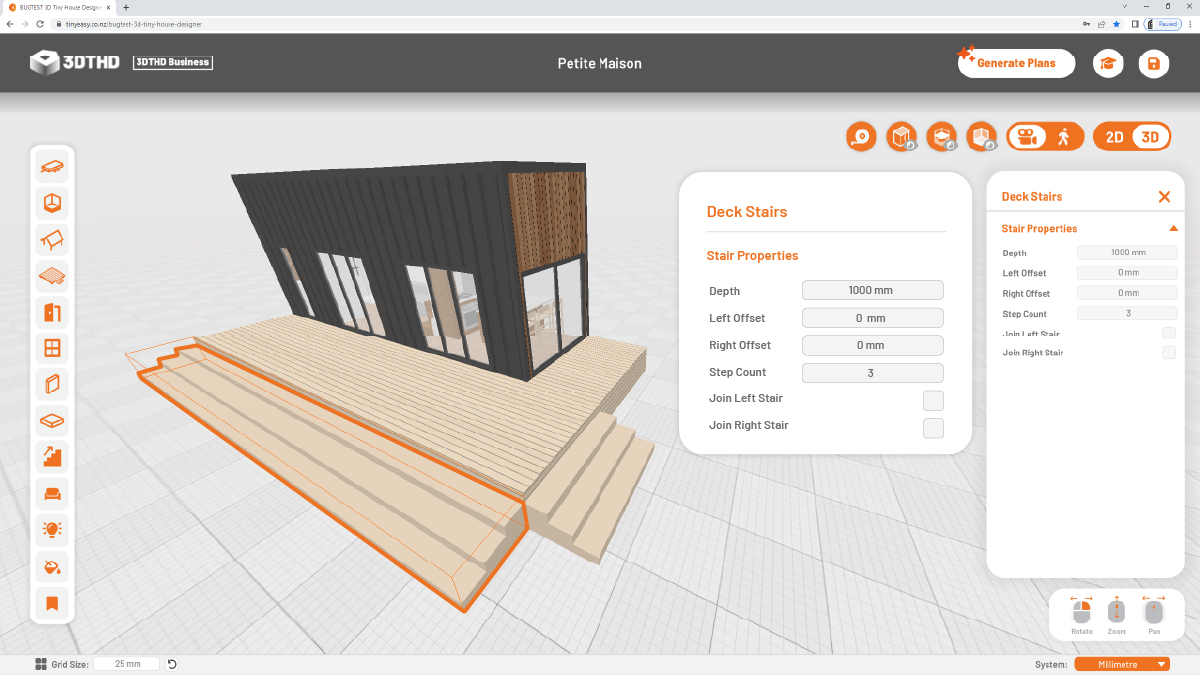
Stair Properties:
In the Stair Properties Menu you can adjust the:
- Depth
- Left Offset
- Right Offset
- Step Count
Plus, you can choose to:
- Join Left Stair
- Join Right Stair
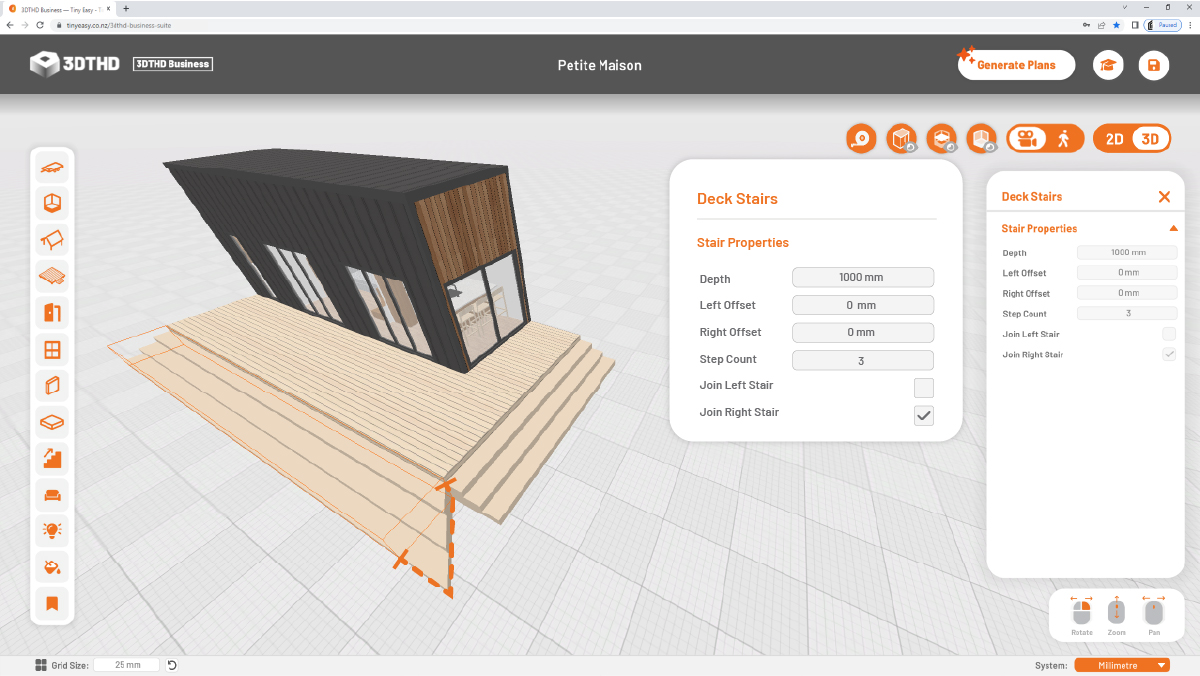
This will exntend the corner of your deck end by a 45 degree angle as a miter joint.